From Chaos there Comes Order

??????????????????????

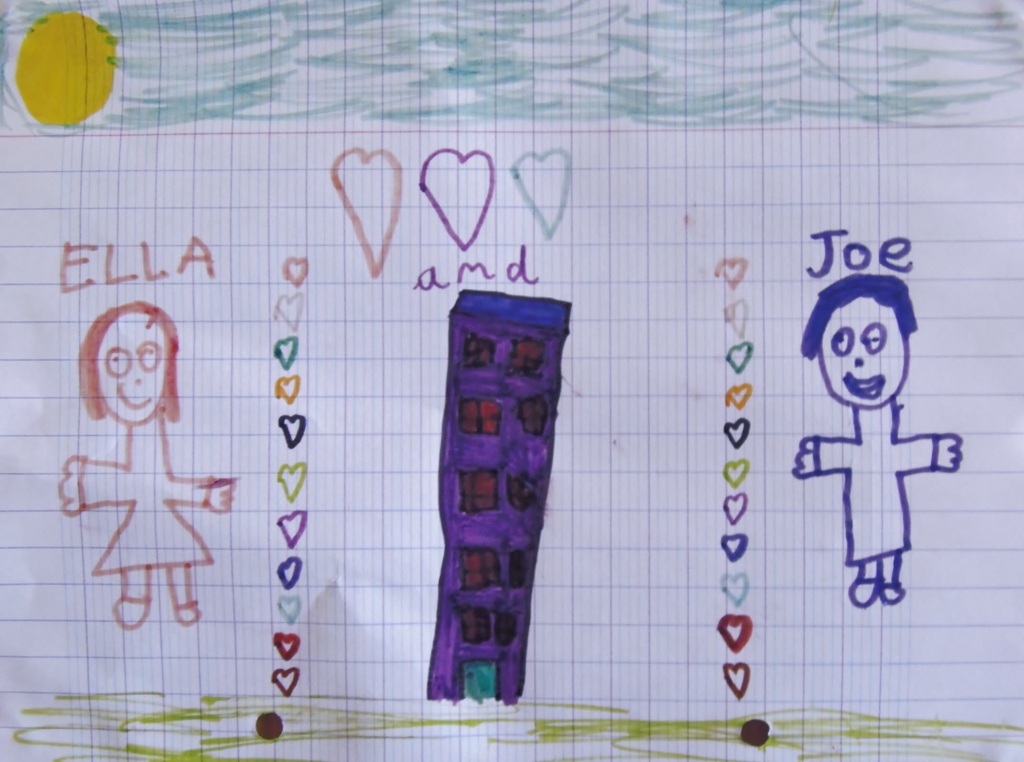
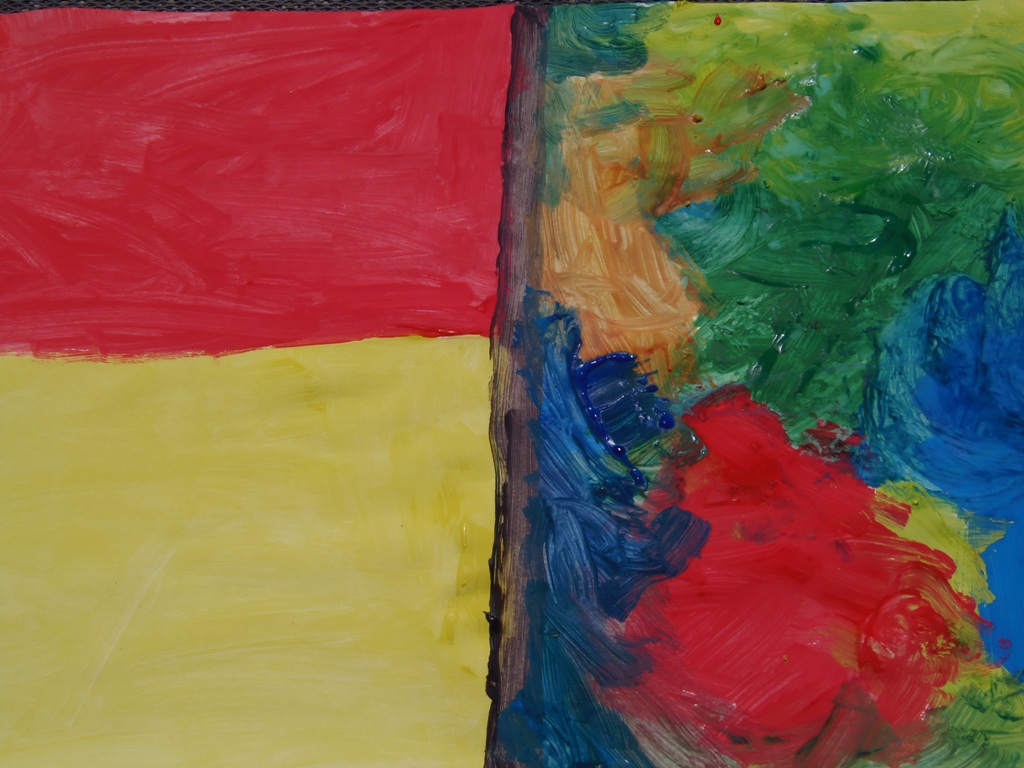
The kids love painting, and the back of an unused roll of wallpaper provides the perfect canvas for big artistic expressions. I thought I’d share this recent creation with you – it is the backdrop for a Welcome Home poster we made for Daddy when he was away one weekend. The kids were allocated half of the space each, and given free rein to paint a background in whatever way they choose. I put out just four colours – red, yellow, blue and green (and a little black, to be used for the centre line only).

Guess whose side is whose?!

Of course, at just three-and-a-half Joe’s brush control is still limited, but I was seriously impressed by his diligence in filling his entire space with colour, and the care he took to use each colour at least once. As the painting session progressed he managed to his delight to create orange and lime green as the colours began to merge (I managed to arrest the inevitable descent towards homogeneous brown!).

Ella on the other hand surprised me with her colour blocks. More often than not her artworks involve deliberate splashes and blending of colours. Yet here, she was dead set on creating two perfect panels of pure colour. It was fascinating to watch.

My girl is busy making sense of her six-and-a-half year old world in so many ways just now. There are endless questions about death, life, where babies come from, who she can marry (Franck at school) and who she can’t (Daddy). And so on. This painting is an extension of her mind, a reflection of the order that eventually develops from the chaos of young childhood. Slowly but surely the world starts to make sense. Innocence begins to be lost. But is replaced by a sense of control that makes anything seem possible, and the wonderful, freedom of choice that maturity brings.

I hope she never stops experimenting.


Advertisement

May the Force-Field be with you

??????????????????????


‘What does this button do Mummy?’

Joe’s twitchy finger flies towards the On/Off switch on my laptop.

‘Noooooooo! We don’t touch that one sweetheart.’

The kids are fascinated by how I spend my time when I’m holed-up in the office working. They will regularly use all their guile to convince Daddy they are playing peacefully, and then sneak out of the house and run down to my writing cave to say ‘Hi’, brimming and grinning with their own cleverness. Unless I have an imminent deadline I don’t mind these brief interruptions – in fact, I love that my freelance life creates this possibility.

But.

I do wish my laptop was equipped with a protective force-field button. They gravitate towards it like orbital bodies on a collision course with planet Mum. Of course they do. It has winking blue lights. It beeps. And Peppa Pig lives inside the U-shaped-Tube hidden beneath the shiny back-lit keys. It bestows the gift of black-and-white colouring sheets to the printer on demand, and magically creates playlists on the ipod of all those chirpy songs from Disney movies. What’s not to like?

I can imagine that in their eyes the laptop receives an irritating chunk of my daily attention quota and has, therefore, assumed a somewhat mythical quality – ‘If Mummy devotes so much time to this piece of electronic wizardry it must be pretty special, right? And I’m a kid, so if it’s special – I WANT ONE!!!’

Hmm. I feel a make coming on. Surely a laptop can’t be that hard to create? And if it distracts jam-covered digits from my working lifeline for at least five minutes then it has to be worth the effort …

It was. Here’s how it played out:

What you will need:

  • Cardboard or thick card
  • Scissors
  • Paint
  • Plastic document sleeve
  • Sticky tape
  • Glue stick
  • Blue tac
  • Circular stickers
  • Colouring pens
  • Thin black or blue marker pen
  • Velcro

How to make it:

  1. Find or cut out a piece of cardboard or thick card that is just a little more than A4 length (30-31cm), and about 2.5 times A4 width (51-52cm). Lay it flat??????????????????????
  2. Mark a line at 15cm in from each end and create an inwards fold along each line – this will create a centre section that is just slightly larger than A4 in all dimensions
  3. If you have the time (and patience!) you can paint whatever colours you like, on both sides. My mini-Mummys were too excited to wait, so we skipped this step. Brown is the new black in corporate-kid world
  4. Take a plastic document sleeve (like the ones you clip into ring-binders) and place it squarely in the middle of the centre section. Use sticky-tape to secure it down its long sides. The strip with holes in can pass onto one of the folded sections and be secured there. This is you laptop ‘screen’??????????????????????
  5. Turn the card so that the narrow end is towards you and the length stretches away from you on the table. The strip of hole in the document sleeve should be on the section closest to you. Take some Blue tac and place a small blob under the bottom two corners of the card. Press them down onto the table in front of you to keep it still??????????????????????
  6. Reach for the top fold of the card, and lift and bend the top fold upwards and towards you, creating a triangle that acts as a stand for your ‘laptop’. Use two more blobs of Blue tac under on the top edge of the card to keep the stand upright
  7. Take some stickers and make a line of 11 small-ish shapes along the row of holes in your document sleeve. Use the marker pen to write the numbers 0-9 on the stickers. On the last one draw the On/Off symbol (incomplete circle with a small line cutting into it vertically from the top)
  8. Using other stickers if you have them, or colouring pens, create a ‘Keyboard’ of letters and other symbols on the flat section of your laptop. For small kids the Alphabet in the right order and a Space Bar is probably sufficient??????????????????????
  9. Ask you child to choose a few favourite pictures and insert them into the document sleeve. Place their favourite on top. This their ‘Screen’, and show them how rotate the pictures to keep it interesting. They can add new ones as they create them
  10. There is one final flourish to add. Unpick the Blue tac but leave it attached to the card. Fold the smaller sections in over the ‘Screen’ – the bottom section first, then the top one. Make a mark in the middle of the overlap on both folding sections. Take a small square of velcro and glue the fluffy section the bottom, and the scratchy section to the top. Now your kid’s laptop is portable??????????????????????
  11. Et Voila! A laptop – just like Mummy and Daddy’s??????????????????????

My two kids (6 and 3) loved this – I suspect any children much older than 8, or any that already have a wealth of electronic gadgets of their own may not be so easily fobbed off with something that doesn’t actually switch on, but you never know! It may not be a force-field, but it could just provide enough distraction to prevent your own kit being destroyed by inquisitive little fingers. It kept mine busy for about 30 mins (Ella) and 5 mins (Joe). Less time than it took to make. Naturally. But that’s not the point is it? Spending time away from the real thing and actually doing something with the kids is what it’s all about 🙂


Thinking Outside the Crayon Box

OLYMPUS DIGITAL CAMERA


There is a fabulous children’s picture book by Drew Daywalt called ‘The Day the Crayons Quit’. In it, a little boy opens his crayon box one day to be confronted with a series of letters from his crayons. Each colour has bared its feelings about the way in which the little boy chooses to colour with it – blue, his favourite colour, is happy but tired and worn out; pink is discontent through lack of use, and so on. It’s a charming and innovative tale, that culminates with the young boy creating a picture where colour conventions are cast aside. Who says the sky has to be blue?

I love this book for the way it encourages children to challenge accepted norms. When we sat down to colour together the other day I was delighted that my daughter declared her intention to create her very own tribute to the book. The resulting picture (above) turned accepted colour wisdom on its head. She relished the challenge of resisting learned habits, carefully and deliberately selecting unusual colours for each part of her picture. It was a pleasure to observe her creativity in action. I could almost touch the freedom of expression as it burst forth onto the page before her.

She was invigorated. I swelled with pride.

Learning to view things from a different angle is a complex skill, but Daywalt’s book has distilled the idea to a beautifully simplistic level. With this new clarity I feel empowered to guide my kids into innovative thought patterns in all areas of their lives. I think I’ll term it ‘Thinking Outside the Crayon Box’, and break out the colour-sticks whenever we’re feeling stuck in a rut of convention.

The Art of Pasta

OLYMPUS DIGITAL CAMERA

In a whizz-bang-flash the latest school year came to a close here yesterday.

WhereDidThatGo?!!

The year in which my girl started formal school, and my boy eased gently into full-time nursery. The year in which I remembered what ‘me’ time feels like. But all that was put on hold when the school herded the kids out for the last time yesterday, and Ella bounded into the room at 7am this morning with the curious early-energy that is so mysteriously lacking on school days. The summer holidays have well and truly landed.

I need a large, strong, hot, black coffee.

There. Much better.

Now. How to fill this expanse of time ahead of us? When I’m around I tend to indulge the children on the first few days of holidays. They are endlessly enthusiastic and in dire need of adjusting their stimulation radar to accommodate the slower pace of non-school life. I like to ease them in gently. An arty activity felt right, but I couldn’t face the paints, not on Day One.

Flushed with the success of replenishing my pasta stocks the other day, I had an different idea to satisfy their creative appetites. Pasta Art.

OLYMPUS DIGITAL CAMERA

I couldn’t quite cope with bursting open multiple tubs, so we applied the KISS principle and worked only with Torti (little spiral pasta shapes that are short and versatile enough to be collectively arranged into a variety of easy shapes). I filled a bowl with Torti and arranged us around it, strategically placing myself between the children to minimise any risk of competitive conflict erupting (it happens).

Let the Pasta Art fest begin!

We started with a face, a tree and a star. Nice neutral shapes that are simple to create. Then the inevitable stereotypes that I’ve tried Oh-So-Hard to prevent in my kids crept in:

Ella – ‘Let’s make a girl!’

Joe – ‘No, a car!’

So we made both …

OLYMPUS DIGITAL CAMERAOLYMPUS DIGITAL CAMERA

The opportunities with this activity are endless. When you consider the diversity of pasta shapes available it’s possible for even young kids to be quite intricately creative. If the mood is upon them.

We fiddled and made pictures, shapes and words for about half an hour before crunching alerted me to the fact that Joe was getting bored and had started eating the uncooked shapes. The clean-up is quick and easy, especially if you give each child a tray to work on. You can even create a guessing game where one child starts a pasta-make, and the others have to try to imagine what it will be. Like Pictionary without the cards and pens.

I love the holidays. Juggling work and childcare is always a challenge, but taking the school-run-rush out of the mix somehow seems to bring an air of calm to the house that is the perfect environment for wild imaginations to thrive.

Once the Pasta Art session was complete the children were dispatched for free play while I made lunch. My Mummy ears remained vigilant for sounds of trouble about the house, but were instead assaulted only with the sounds of collaborative industry. Together the children made a pirate boat from the living room chairs, and amused themselves with walking the plank and fighting sea monsters. I smiled to myself – it so often seems to me that creative endeavours stimulate the imagination in more ways than one. The Pasta Art session was half an hour well spent.

Living in Mid-Air

Mid-Air People


My daughter has quite an abstract approach to art. Her selections of shapes and colours are bold, and spill across the page in a confident mass. The balance in her drawings is quite startling for one so young and I suspect reflects her (sometimes over-) developed sense of fairness. Which itself becomes particularly apparent in circumstances where she perceives favour to be weighed against her!

Gluing a tiny selection of her prolific productions into a scrapbook for posterity, I was taken by one that depicted her and little brother either side of a house. The space around them was festooned with love hearts, and colours for each figure carefully chosen to represent their favourites of the moment (pink for Ella, blue for Joe).

What struck me particularly was the way both figures were suspended in the air. Despite there being a careful line for grass, an equally horizontal bar of blue above, and the house being firmly rooted on the ground, the children were shown suspended in the No Man’s Land of white horizon, as if at the top of a bounce on a trampoline. Grinning madly.

It’s a happy picture – most of her drawings are. Thankfully. I always remember that scene in Sixth Sense where the little boy says he draws rainbows instead of the images of horrific violence that were haunting him, in order to satisfy the school therapists – ‘They don’t have meetings about rainbows’. Guess we’re doing something right then.

Anyway, I digress. Suspended people. What’s that all about? I began to fester …

Does she feel ungrounded? Without a firm base in life? Is she watching too many Fairy movies and genuinely thinks people can fly?

Or did she just start drawing the heads too high up on the page and not want to make the legs look stupidly long? I suspect this last is true. Or maybe I’m kidding myself and she is less secure that I’d care to imagine. Guess I’ll never know for sure so should quit worrying and get a life!

On reflection I think this picture is a perfect example of how our kids are not yet bound by the constraints of knowledge that dogs us as adults. It’s a freedom I’m keen for her to retain in her arsenal of art techniques. And I hope she can grow to apply this freedom of thought to her life.

Imagine the impossible.

Dare to dream.

Convention is creeping in as her depictions of grass and sky squeeze ever closer together. But for now, mid-air people are very okay in her world. Long may that last.

Bows and Arrows

Image

As a budget conscious parent I’m always on the lookout for fun things to do with the children that don’t cost anything. The natural world has a lot to offer, and as we mooched about the site on a recent camping trip, an idea presented itself ….

We were collecting twigs for a campfire, and as we scanned the sun-bleached grass for suitable tinder wood my mind began to play tricks – were the twigs lying randomly on the ground, or was there an order to their arrangement?

After going slightly cross-eyed, I vaguely recalled reading ages ago of some psychological research around the idea that the brain seeks to find familiar shapes out of random forms – it’s one of the reasons why cloud watching works so well.

In seeking order from the twig-collection my brain was finding apparent pathways, and it struck me we could make a simple treasure trail.

So we arranged arrows every few paces on the ground, in a meandering path around the site, and the children had great fun following it (well, Joe, 2, tried to dismantle it, but was eventually dissuaded from his task with the lure of a mid-afternoon snack!).

Not satisfied with just a trail, my daughter decided that it must lead to some treasure.  So we hunted for precious things that would make suitable booty.  A pale flat stone, a feather and a perfect blade of yellow hay caught her imagination.  A stray red strand of thin plastic, which I think was originally a tie for a bin bag, made the perfect ribbon and bow for our parcel.

Trail and treasure complete, we had a fun hour hiding, tracing, and discovering … a game that was repeated with multiple changes of route and secret hiding places for the treasure.

The KISS Flag

??????????????????????

Come on, hands-up – which of you has ever embarked on a craft project with your child that you know is over-complex?  My hand is up.  I know I am guilty of this.

When my son was 18 months old he loved cars.  (He still does.)  I decided it would be a great idea for us to work together to make him a car from boxes, toilet rolls and bottle tops.  He’d been walking for only 2 months, and was still in a high chair.  But I persisted.  It would be GREAT I told myself.  He’ll LOVE it.  What a fabulous way for us to bond.

I was so full of my own cleverness of course that I totally lost that this was supposed to be about him, and for him.  And I made it all about me.

We found boxes together, and he then sat getting increasingly frustrated whilst I manically tried to glue toilet rolls to cereal boxes.  Why does it look so easy on the TV shows?  He started crying.  I nearly did too.  After half an hour I triumphantly presented my poor sobbing lad with a “car”.  He threw it on the floor.

I don’t blame him.

I tried to learn my lesson, but even now when one of my angelic charges approaches me to ask if we can make or paint something I find it hard to rein in my own natural enthusiasm to go large.  What they really want, and need most of the time, is to do it simply.  And in their own way.

Today my daughter reminded me of this.  We embarked on a painting session.   She wanted to use small delicate brushes, so we did, and I painted too.  I was enjoying myself a lot, I’m no Picasso but the act of taking time out to be creative is very therapeutic.  I lost myself in my picture and became aware she had started mixing paint with straws and daubing big blobs on her arms.  A sure sign that boredom had set in.

“I’d like to hand paint” she announced.  Wrenching myself away from my own mini work of art I realised I had done it again.  I looked at her pleading face and reminded myself of the phrase I so often heard in corporate life:

Keep It Short and Simple

So we did.  She wanted to make a flag, a single hand-print either side of a sheet of white paper, and stapled to a garden cane.  That was it, and it worked a treat, I hope you like the picture.  She was delighted.  And I was once again reminded that the simple things often make them the happiest.

Her creation has become the KISS Flag, my emblem and reminder to listen to what my children need.  I’m sure I’ll forget again, but hey, I’m only human!

Clouds, Illusions I Recall …

© Oslovite (Own work), via Wikimedia Commons

As the kangaroo morphed into a whale the giggling got the better of us.  What had started as a mist had now turned into Moby Dick, and was threatening to swallow the house.  The children screamed in delight ……

We were cloud watching, lying in a row on the grass in the front garden.  I’m certain the passing neighbour thought we were quite bonkers.

Keep a close eye on the heavens and watch for moisture-laden blue-sky days where clouds start to form.  The stories that grow as the clouds take form can be as fantastic and as wild as your imagination.  The story can happily end there, or these tales of the tallest kind can be later recalled and blown once more into shape:

  • With card, glue and some cotton wool you can recreate your cloud shapes on the kitchen table
  • White pastels smudged onto blue card can bring out the artist in a child of any age
  • For older children the stories can be retold, written out, and illustrations created to make your very own story book – if you bind it through holes with string you can add to it another day when the skies come alive with stories once more

Capturing Seaside Memories

The summer holidays are a time for making memories, and a visit to the seaside is a treat that many children will treasure forever.  All those experiences of windswept or sunny sand banks, clambering in and around rock pools and dipping toes into chilly waves can leave a delightful and indelible mark on the childhood psyche.

As I write this I’m accessing the faintest hints of memories from many years ago, a tranquil smile on my face and a warm fluffy feeling inside …. leaving home in the dawn hours, crammed into the backseat of the car, wedged in by the cool box not a car seat … slip-sliding with giggles across planks laid on muddy fields outside our tiny caravan home … shell hunting in the rain … burying Dad in the sand … squirming at the feel of slimy seaweed underfoot … buying pink rock from a beachside stall …

My memories.  And now I’m a grown-up I like to help my children make theirs.

My daughter loves collecting pebbles.  The more colourful the better, and if they are smooth and have specks that glisten in the sun she is in heaven.  She also loves shells, and the pearlescent shimmer of the interior that seems to ebb and flow like the tide.  Driftwood, dried seaweed, and crab claws all make lovely additions to the stash.

A beach treasure hunt is a lovely way to take a walk in the salty air, and collect treasure at the same time, but how to make the excitement last?  Here are a few ideas:

© Youssouf Cader | Dreamstime Stock Photos

© Youssouf Cader Dreamstime Stock Photos

A Seaside Memory Jar

  • Save some sand in a bag
  • Help your child sort the special items from their collection (there are likely to be a lot of weird and wonderful items in there!), and wash them together in the sea
  • Dry the sand and other items thoroughly at home
  • Find an attractive jar – a mason jar, or jam jar with a colourful lid are ideal – sterilise and dry it completely
  • Empty the sand into the base of the jar to create a mini-beach
  • Arrange the treasures on top
  • Seal the jar – it can be nice to decorate it with a bow, and a sticker to note the date the items were collected

A Memory Box

This is the same idea as the jar, a place to store your seaside gems, but allows you to also add in a few photos, and pictures you child has drawn to reflect the day.  Decorating the box with seaside shapes, starfish, mermaids, sailboats, and so on can make it extra-special.

A Shell Box

  • Collect a good selection of shells from the beach
  • Wash and dry them at home
  • Find a sturdy cardboard box about the size of jewellery box
  • Paint it in seaside colours
  • Glue the shells to the outside
  • Your child can use it as a treasure chest for other items found on the beach, or anything else they choose

A Sand Picture

  • Bring some sand home from the beach and dry it thoroughly
  • Take a large tray, a thick piece of card, and some white PVA glue
  • Choose a seaside theme with your child, and sketch a few simple shapes – a boat, a starfish, a whale, a fish, whatever fires their imagination
  • Daub glue liberally onto the card in the form of the shape you have drawn
  • Sprinkle the sand all over the glue and leave it to dry
  • Shake off the excess sand and there you have a sandy seaside shape
  • A light spray with a fixing agent such as Spray Mount will help to prevent any excess sand falling from the picture over time